Even those who don't do wire wrapping on a regular basis often find themselves working with wire in one way or another. Here are a few techniques that are common to many different types of jewellery making. These are all made with simple tools, pliers, hammers, mandrels and the like. Building on these techniques, you'll be able to make many of your own connectors and findings, including clasps, ear wires, headpins and even chains!
Making a Loop
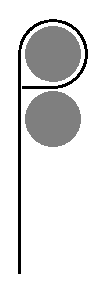
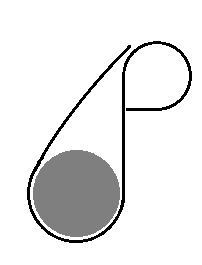
With your round nose pliers grasp one end of the wire and rotate until the wire looks like a “P”.
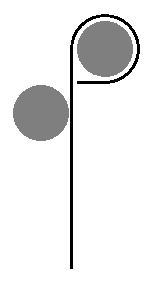
Centre the loop by turning your pliers until one tip is in the loop and the other is behind.
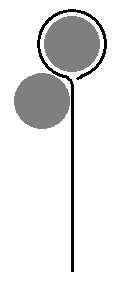
Rotate the pliers just a bit more until the loop is centred over the wire.
Wire Wrapped Loop
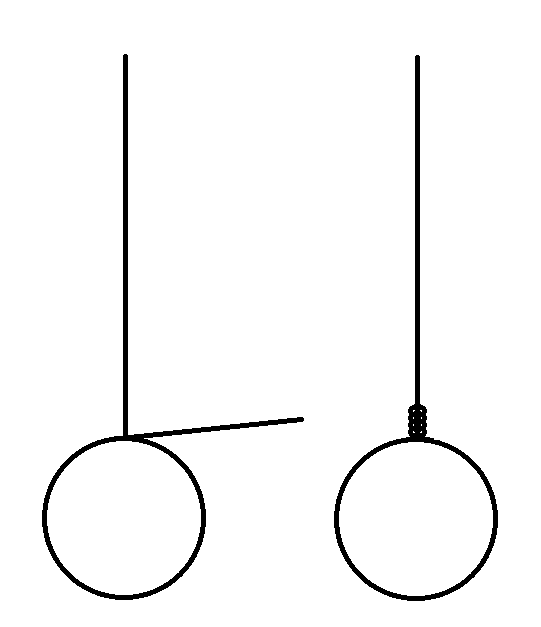
Grasp the wire about 12-25 mm (1/2 – 1”) from the end and make a loop (fig 4).

Centre the loop. If you wish to insert anything into the loop, do it now as the next step will permanently close the loop.
With a pair of chain nose pliers in your non dominant hand, grasp the loop just above where the wires cross.
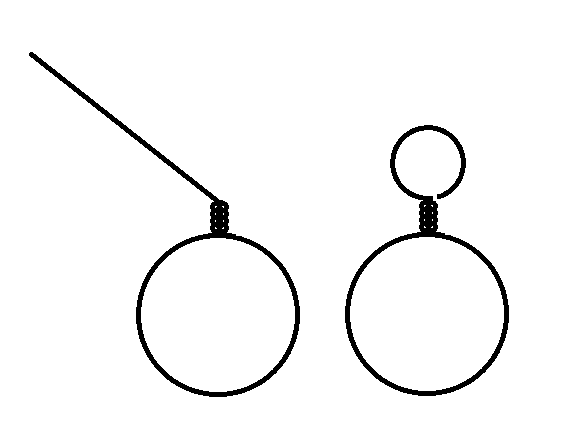
With your fingers, or another pair of chain nose, wrap the short tail around the longer wire. When you are satisfied with the number of wraps, cut off the excess and make sure the wrapped end is tucked in or filed down so it doesn’t catch on clothing.
With your fingers, or another pair of chain nose, wrap the short tail around the longer wire. When you are satisfied with the number of wraps, cut off the excess and make sure the wrapped end is tucked in or filed down so it doesn’t catch on clothing.
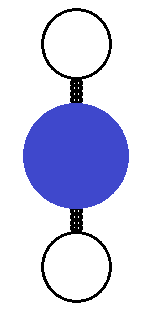
Make a bead link by sliding a bead on the wire and making another wire wrapped loop on the other side of the bead.
Hook
This will make a hook about 20 mm (3/4”) long.
Cut a piece of 18g wire about 50 mm (2”) in length. File the cut end of your wire smooth. Using your round nose pliers, turn a small loop on the filed end. To make the curve for the hook, place a mandrel (anything round will do, a pen or sharpie for instance) about 6 mm (1/4”) down from the loop and wrap the wire around a mandrel until the wrapped end and wire are in close contact.
Cut a piece of 18g wire about 50 mm (2”) in length. File the cut end of your wire smooth. Using your round nose pliers, turn a small loop on the filed end. To make the curve for the hook, place a mandrel (anything round will do, a pen or sharpie for instance) about 6 mm (1/4”) down from the loop and wrap the wire around a mandrel until the wrapped end and wire are in close contact.

Bend the tip of the wire out and file. Hammer the hook gently to harden it.
"S" Clasp
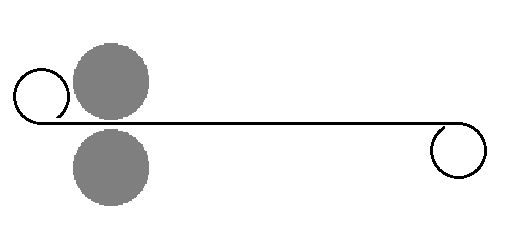
Cut about 65 mm (2 1/2") of wire. (The length of your wire will be determined by how large you make your curves. Try making it in copper wire until you've got a clasp the size you want.) Make small loops with the tips of your round nose pliers at each end of the wire. The circles should be flowing in opposite directions from each other.
Grip one end with your round nose pliers. The little circle should be sitting up on top.
Grip one end with your round nose pliers. The little circle should be sitting up on top.
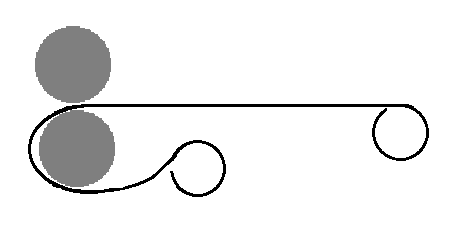
Bend the wire around the pliers until the back of the little circle is touching the wire..
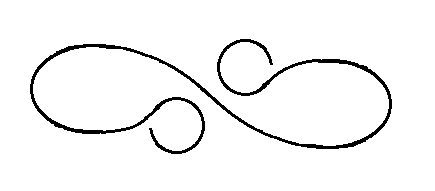
Do the same with the other end, make sure the little circle is sitting on top. You can hammer both of the large loops for a finished look and this will also harden the wire. Leave one end slightly open so that a jump ring can slide through.
Toggle Clasp
There are two parts to a toggle clasp, the toggle ring and the bar. The ratio between the diameter of the toggle and the length of the bar is very important. The bar should be at least 1.5 times the diameter of the toggle. Anything less than that and the bar could easily slip out of the toggle and the piece will fall off. It also helps to have a loop, ball or other obstacle on the ends of the bar to prevent it from falling out.
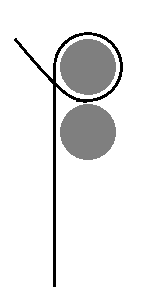
Toggle Ring

Start with a piece of wire about 15 cm (6”) long. Starting just a little off center, wrap the wire around a mandrel (a marker or highlighter will work well), crossing the wires at the top. One wire should be slightly longer than the other.
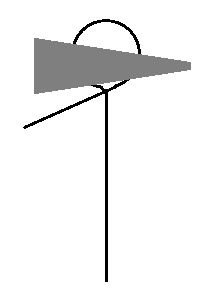
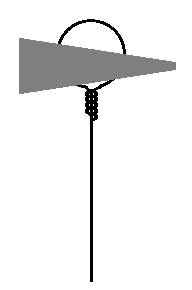
Bend the longer tail so that it points straight up. Wrap the shorter tail around the longer tail 4 or 5 times.
When you're done wrapping, bend the longer tail off to one side about 45º, then make a loop. Cut off the excess wire and the toggle ring is done!
Bar
Grip a 10 cm (4”) piece of wire at the centre point with your round nose pliers. Bend each side over the pliers until the wires cross at the top. Try to make sure the wires are the same length on each side. If they're a little off, just trim the excess.

Make a small loop on each end of the bar. The bar should be at least 1.5 times the diameter of the toggle ring.
If it's too short, start again with another piece of wire, a little longer than the first. If it's too long and won't fit through the ring, keep turning the end loops in toward the centre until it's the right length. Then trim off the excess.
If it's too short, start again with another piece of wire, a little longer than the first. If it's too long and won't fit through the ring, keep turning the end loops in toward the centre until it's the right length. Then trim off the excess.
Jump Rings
You'll see a lot of jump rings when you make jewellery. You can buy them, but unless you're using large quantities, it's more economical to make your own.

Wrap your wire around a mandrel of the size you want, then all you have to do is cut the rings off the coil. You can use flush cutters, just be aware that even the best flush cutters may leave a small ridge that needs to be filed down. The better option is to use a jeweller's saw to make flat cuts.
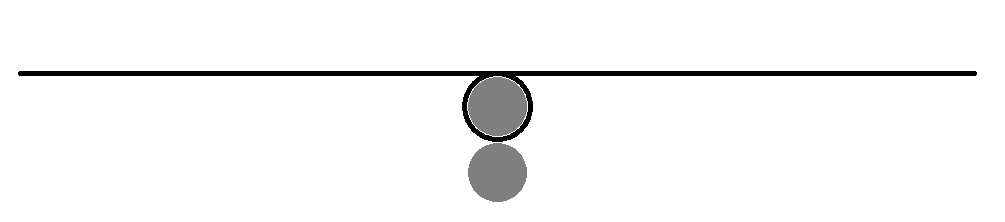
To open or close jump rings, use 2 pairs of pliers to twist them open or closed. Don't try to pull them open, this will just deform the ring.
So far I've concentrated on metal in jewellery making, and I'll have a lot more to say about it in the future! Next time though, I thought we'd take a little side trip and start talking about another side of the process. Stay tuned!
 RSS Feed
