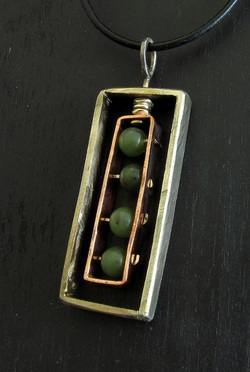
Tube Rivets
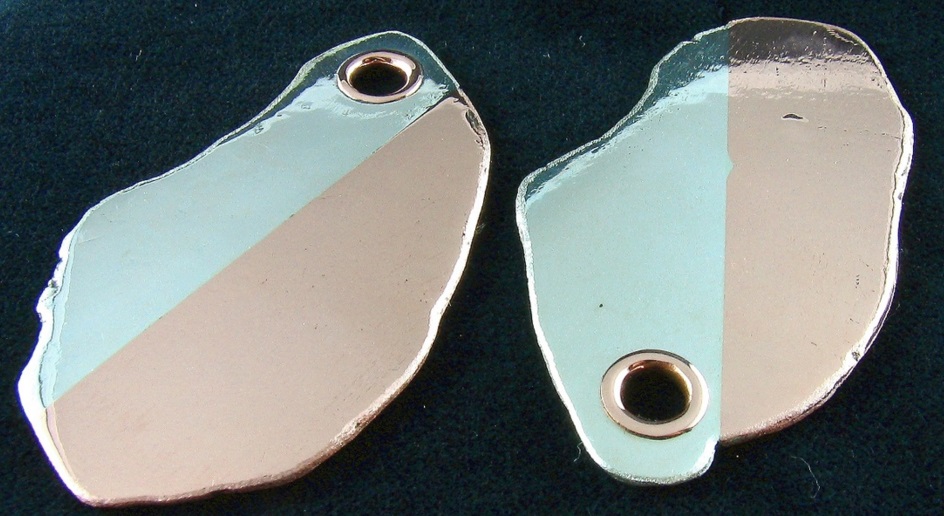
Tube rivets can make a very interesting design element and they can also serve a practical purpose. A tube rivet is a great place to put a jump ring or other attachment to work as a bail or linking mechanism.
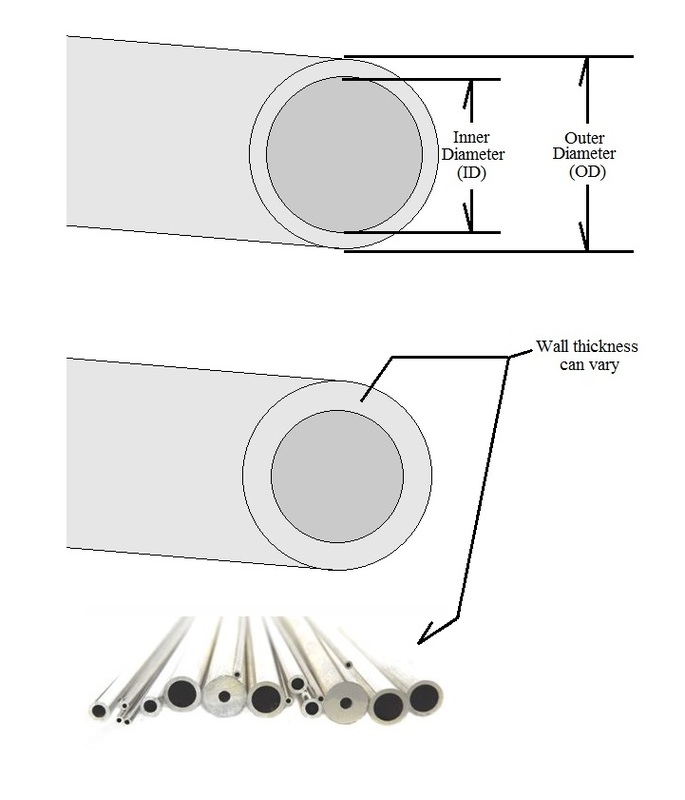
Before we jump into the riveting, let’s take a look at the tubing. Tubing can be found in many different sizes and it is measured in a couple of different ways. It can be measured by its outside diameter (OD) or it’s inside diameter (ID). When choosing the size you want and when drilling your holes, make sure you are referencing the right measurement. Another thing to consider is the thickness of the tube wall. If it is too thick, it will be more difficult to rivet, if it is too thin it may tear instead of curling over. When in doubt, go thicker. The best advice is to make a practice piece and see what works. The third thing to consider when choosing your tubing is whether or not it is seamless. Seamed tubing will have a tendency to split as it is being set. With seamless tubing, that should be less of an issue.
Once you’ve chosen the size of tubing you want, you need to determine the length that you’ll need to make your rivet. The rule of thumb is that you’ll want ½ the diameter of the tube sticking out from each side of your piece. So, if you are using 5 mm (OD) tubing for example, you’ll want 2.5 mm sticking out from either side. If you are riveting together two pieces that are 1 mm thick, then you’ll want to cut a length of tubing that is 7 mm long. (1 + 1 + 2.5 + 2.5 = 7) I would suggest cutting the tube a fraction longer than what you need to allow for filing and cleanup after the cut.

When you’ve determined the length that you’ll need, there are a few different ways to cut the tubing, depending on the diameter. For larger diameter tubing, you may be able to use a tube cutter. This tool is basically a blade and 2 rollers in a clamp. Position that blade where you want the tube cut, and then tighten the clamp until the tube is held securely between the blade and the rollers. Be careful not to over tighten, this will make cutting harder and may crimp the tube. Once the cutter is in place, turn it around the tube until it spins freely. Tighten the clamp a little bit and then spin it around the tube until it spins freely again. Repeat this process until the tube is cut all the way through. Clean up any burrs caused by the cutter.
For tubing that is too small for the cutter, it’s easiest to use a jeweller’s saw.
I’ll stop here to say a few words about using the jeweller’s saw. I experienced a lot of frustration and more than a few broken blades, before I figured out how to use it properly. I’ll attempt to save someone else the same frustration….
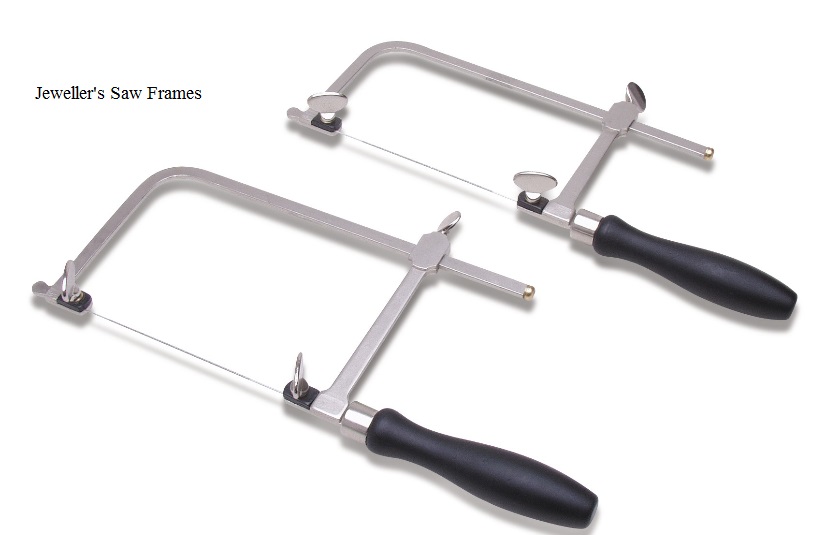
You’ll notice screw clamps at the top and bottom of the frame. The saw blade is inserted here with the teeth facing out and pointing down. Tighten one clamp, I prefer to do the top clamp, but it’s up to you. The blade needs to have some tension on it so you’ll have to push the top of the frame against something solid to compress the frame slightly. Tighten the loose clamp securely while the frame is compressed. The blade should give a high pitched “ping” when plucked. Now that the saw is ready to go, use some lubricant such as candle wax, beeswax or BurLife on the back side (toothless side) of the blade. The saw cuts on the downward stroke, but by starting on an upward stroke, you will wear a little groove in the metal that will make it easier to start the cut.
You’ll notice screw clamps at the top and bottom of the frame. The saw blade is inserted here with the teeth facing out and pointing down. Tighten one clamp, I prefer to do the top clamp, but it’s up to you. The blade needs to have some tension on it so you’ll have to push the top of the frame against something solid to compress the frame slightly. Tighten the loose clamp securely while the frame is compressed. The blade should give a high pitched “ping” when plucked. Now that the saw is ready to go, use some lubricant such as candle wax, beeswax or BurLife on the back side (toothless side) of the blade. The saw cuts on the downward stroke, but by starting on an upward stroke, you will wear a little groove in the metal that will make it easier to start the cut.
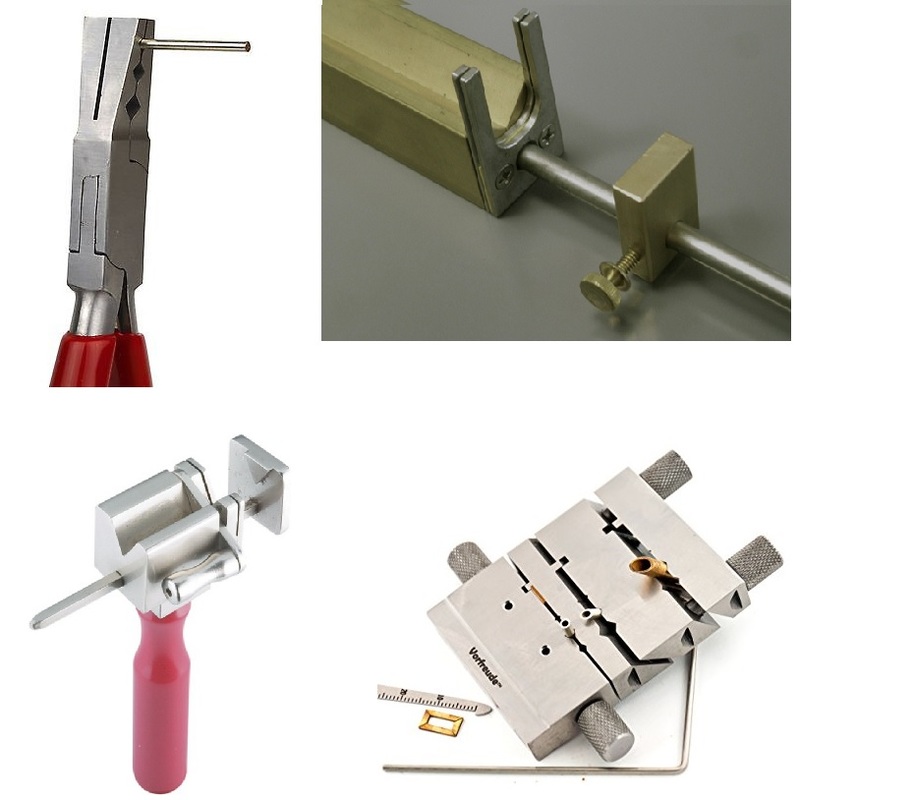
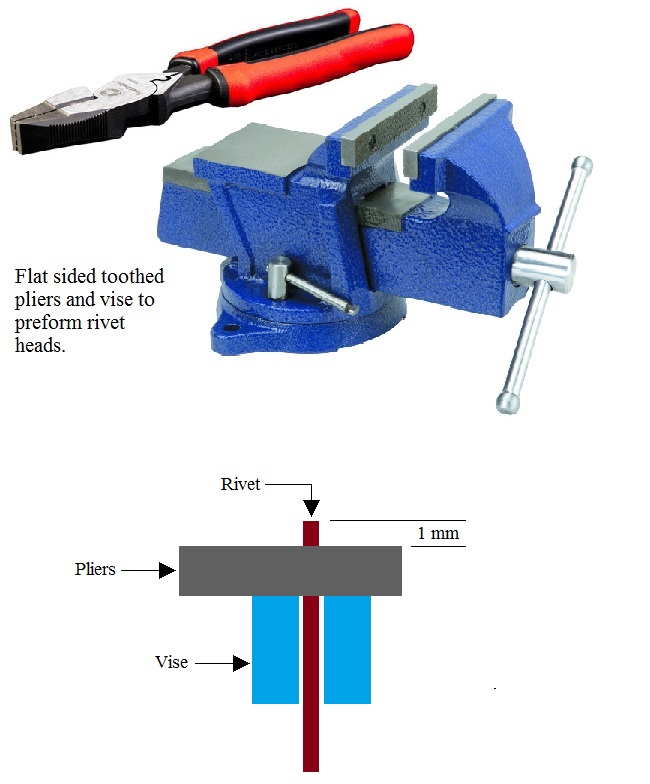
Saw through the tubing with long steady strokes. Let the saw do the work, you don’t need to put a lot of pressure on the blade. There are pliers and jigs available to help make the sawing easier and more accurate.
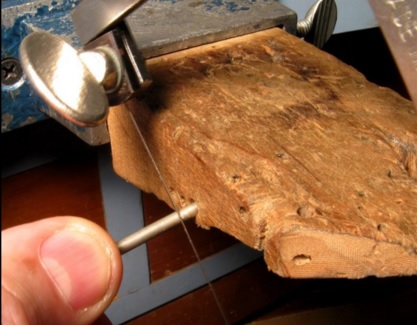
While they are nice to have, you don't need tube cutting pliers or jigs, you can just hold the tubing while you saw. If you’re having a hard time holding the tubing still, drill a small hole in the side of your bench pin, slightly larger than the diameter of the tubing and a little bit longer than the length of tube you want to cut. Insert the tubing in the hole, hold the other end in your hand and saw away, the tubing will be held in place. If you don't want to drill into your bench pin, a piece of scrap wood held in a vise will serve the same purpose.
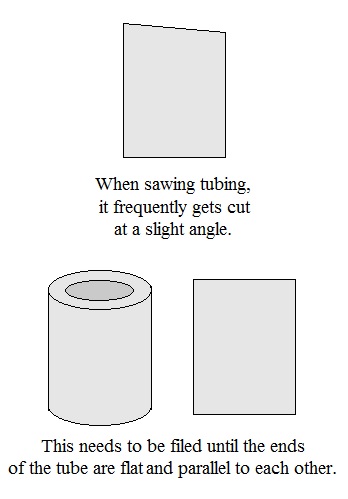
Once the tubing is cut, clean up any burs and file both ends of the tube flat. Be careful when you’re filing; you don’t want to remove too much material. Measure often!
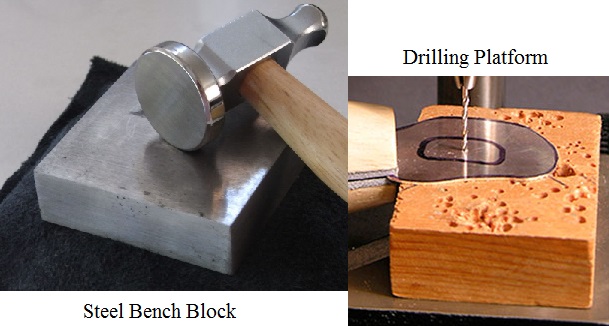
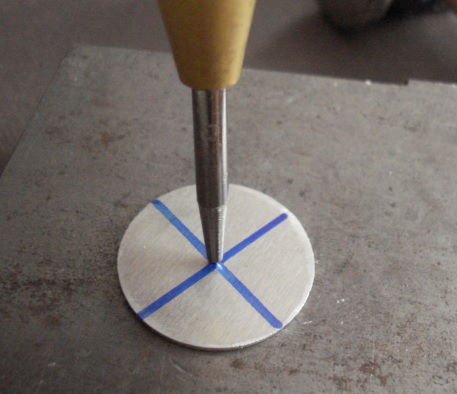
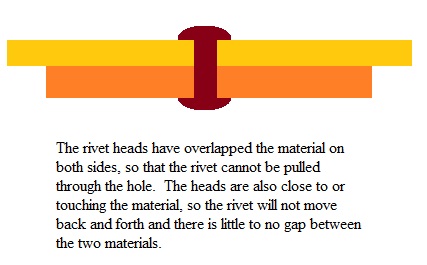
When the tube is ready, assemble your piece, place the tubing into the rivet hole and place it on a flat, hard surface, such as a bench block. Now you are ready to start setting the rivet and of course, there are a few different methods of doing this.
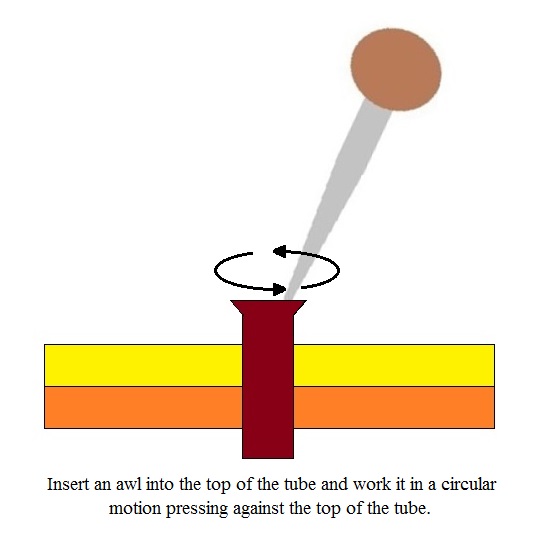
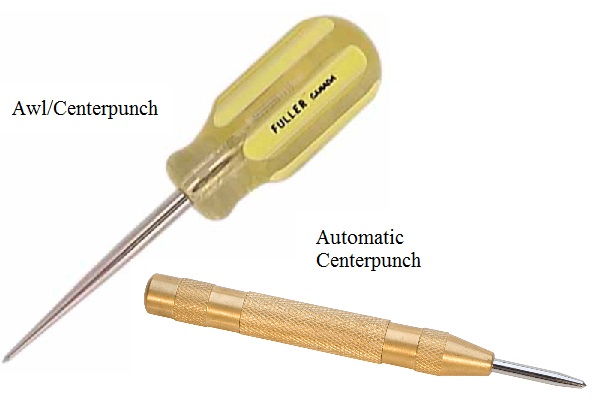
You can insert an awl or other tapered tool into the tube and move it around in a circular motion, pressing against the top edge of the tube. This will start to flare the top of the tube outwards. Once it’s started, turn the piece over and do the same to the other side of the tube.
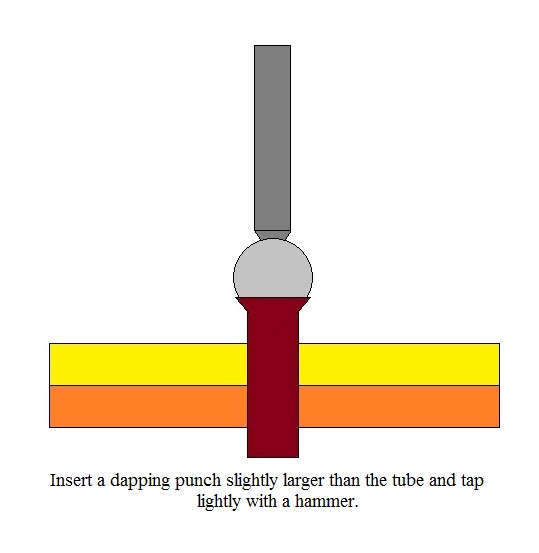
The second method is to place a small dapping punch into the top of the tubing and give it a couple of light taps to start the flare, then flip and repeat on the other side.

The third process is similar, but instead of using one dapping punch, you use two. Place one in a vise and fit the bottom of the tube onto it, then place the second punch in the top of the tube. Tap it lightly a few times and this will help flare both ends at once. It may not flare evenly however, so after a few taps, flip the piece and repeat.

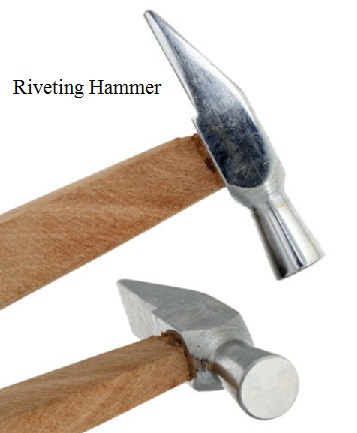
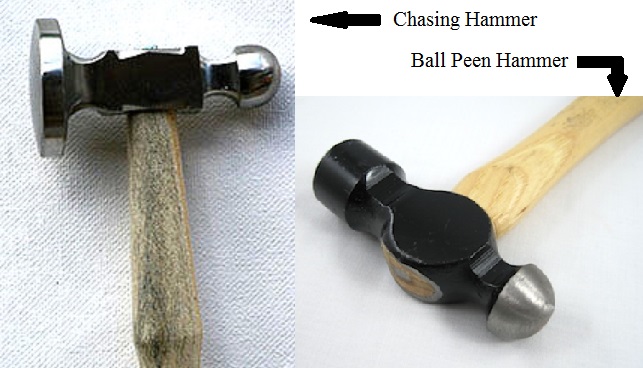
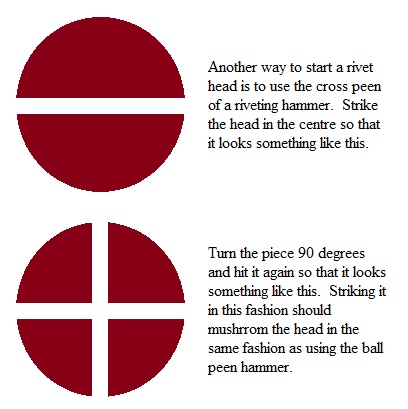
No matter which method you’ve used to start the flare, the process is continued with progressively larger dapping punches until the tube expands and the edges start to roll over. At that point, the tubing is sufficiently flared and you can work with just a hammer. Some prefer the flat face of a riveting hammer, others, like myself; prefer to use the ball of a small ball peen hammer to continue.

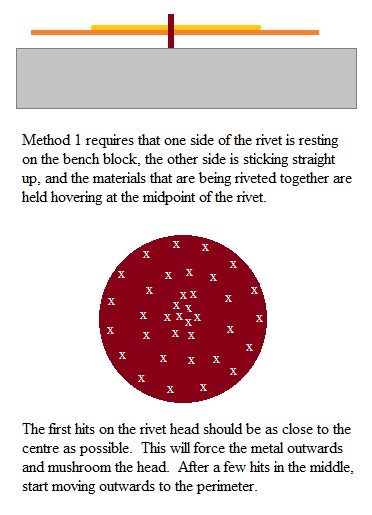
As you hammer the edges down, make sure you tap in a circular pattern around the outside with an outward and down motion. This will push the metal out and down, not just down, and give it a nice rounded appearance.
For a flatter looking rivet, simply tap the rivet centrally with the flat face of the hammer.
For a flatter looking rivet, simply tap the rivet centrally with the flat face of the hammer.
Remember to tap one side a few times, then flip and tap the other side. This will keep the tube from bending and will ensure that the rivet heads look even on both sides.
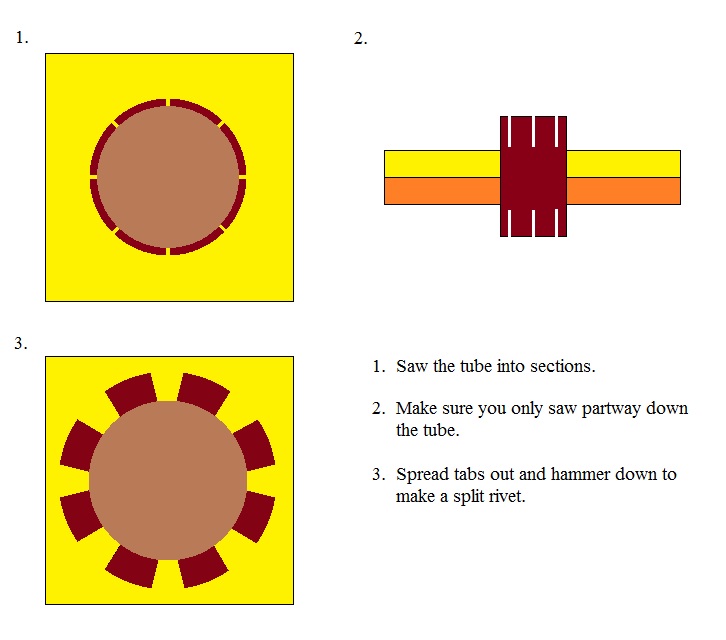
A tube rivet may also be used as a split rivet by sawing partway down the tube, dividing it into sections. The sections then become tabs that are spread out and hammered down.
Blind Rivets
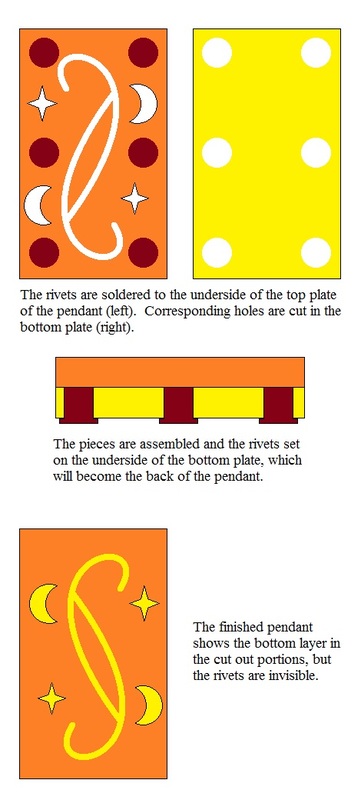
In the previous post we discussed wire rivets, and I forgot to mention one variation: the blind rivet. Knowing how to make a blind rivet is wonderful when one side of your piece must not show any type of rivet at all. The blind rivet is a mix of hot and cold connections as it requires the use of a torch. One end of the rivet is soldered to the inner surface of one material. The other material has holes to accommodate the rivet. Once all the rivets are soldered and all the holes are drilled, the materials are assembled, the rivets are cut and filed to the right length and then set in the same fashion I described in Riveting Part 1.
Until next time, happy creating!


 RSS Feed
