
Wire wrapping was how I got started in jewellery making. It's a great way to begin, you don't need a lot of tools or materials, so you're not spending a fortune. Plus, it's portable! You can take it with you on vacation, or just sit on the couch and watch TV while you wrap.
Just a quick word about wire before we start.
Wire comes in many different shapes; round, square, rectangular, half-round, triangular. Then of course there's bezel and gallery wire and patterned wire. So much wire! Not only does it come in different shapes, but of course, you can buy wire in different metals. For our purpose here though, I strongly recommend starting with ordinary round copper wire that you can find at the hardware store.
The size of your wire is pretty important, and there are a lot of different ways that the size is measured. It can get a little confusing. I'm sticking to AWG – American Wire Gauge in this post, you can find conversion charts online if you need it. The important thing to remember about wire size measured in gauge (ga), is that the smaller the gauge number, the larger the wire. So a 14 ga wire is much larger in diameter than a 20 ga wire.
Defintion
Wire can be purchased in different tempers, the most common are dead soft, half hard and full hard. Dead soft wire is very easy to bend and shape, but it does not hold it's shape when stressed, as in a clasp. Half-hard is still fairly easy to work and will maintain an intricate shape under moderate stress. Full-hard is much more difficult to shape, but it holds its shape once you get it done. Full hard is good for clasps. Wire will work harden, meaning that the more you bend or shape the wire, the harder it will get. So dead soft wire will become full hard eventually. If it is worked too much though, it will break.
Now, ready to get to work?
Just a quick word about wire before we start.
Wire comes in many different shapes; round, square, rectangular, half-round, triangular. Then of course there's bezel and gallery wire and patterned wire. So much wire! Not only does it come in different shapes, but of course, you can buy wire in different metals. For our purpose here though, I strongly recommend starting with ordinary round copper wire that you can find at the hardware store.
The size of your wire is pretty important, and there are a lot of different ways that the size is measured. It can get a little confusing. I'm sticking to AWG – American Wire Gauge in this post, you can find conversion charts online if you need it. The important thing to remember about wire size measured in gauge (ga), is that the smaller the gauge number, the larger the wire. So a 14 ga wire is much larger in diameter than a 20 ga wire.
Defintion
- Temper – the degree of hardness and elasticity in metal
Wire can be purchased in different tempers, the most common are dead soft, half hard and full hard. Dead soft wire is very easy to bend and shape, but it does not hold it's shape when stressed, as in a clasp. Half-hard is still fairly easy to work and will maintain an intricate shape under moderate stress. Full-hard is much more difficult to shape, but it holds its shape once you get it done. Full hard is good for clasps. Wire will work harden, meaning that the more you bend or shape the wire, the harder it will get. So dead soft wire will become full hard eventually. If it is worked too much though, it will break.
Now, ready to get to work?
Materials
| 80 cm (30”) 20 ga wire 20 cm (8"0) 22-24 ga wire I recommend copper wire, it's inexpensive and easy to find. And if you don't like how it's turning out, it's not as painful to scrap it and start over as it is with silver. | Cabochon – minimum 18mm x 13 mm (¾” x ½”) This technique will allow you to wrap stones of any shape and most sizes. For a beginner though, a cab is easier as it has a flat back and a uniform shape. The size I suggest is also based on what is easiest for someone new to wire wrapping. |
Tools
| Wire cutters Flat nose pliers Round nose pliers Chain nose pliers Sharpie Masking tape | Measuring tape Pipe cleaner File Pocket knife – doesn't need to be sharp, but needs to be a smooth blade, no serrations |
Making the Pendant

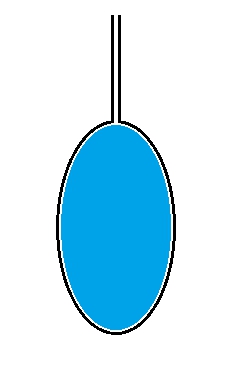
Measure the circumference of your cabochon by wrapping the pipe cleaner around it and then measuring the length of the pipe cleaner. Add at least 90 mm (3 ½”) to the measurement for the bail and any decorative elements you wish to add and cut wires to that measurement.. You should have enough wires to cover the side of the cabochon plus 2, one overlapping the front of the cab and one overlapping the back.
Bundle the wires together, with all the wires even on the ends. Using masking tape, secure the bundle at each end and mark the middle of the bundle with the Sharpie.
Cut a 40 mm (1 ½”) length of the 24 ga wire. Using the tip of the flat nose pliers, make a 180° bend at one end about the same length as the width of your pliers. This is your wrap wire.
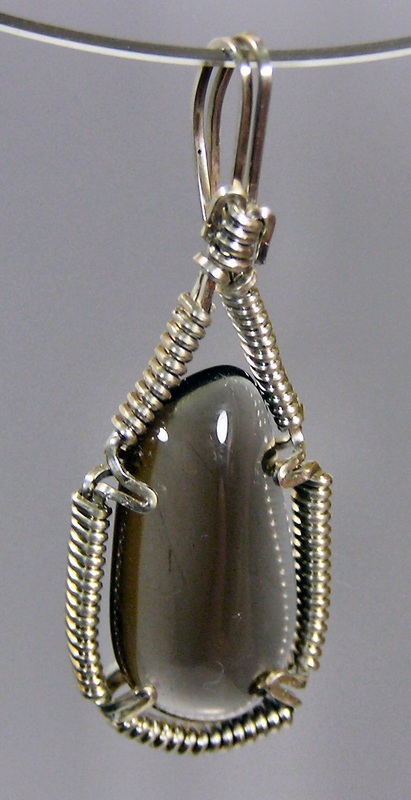
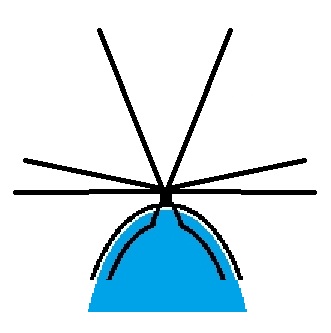
Hook the wrap wire around the bundle just to one side of the center mark. Bend the wrap wire around the bundle and squeeze it tight with your flat nose pliers. Make 4-5 complete wraps, squeezing each one tight. Cut off the excess wire. Make sure your cut ends are on one side of the bundle. This side will be placed against the cab so you won’t see the cuts. Your wraps should be tight next to each other as in the picture.
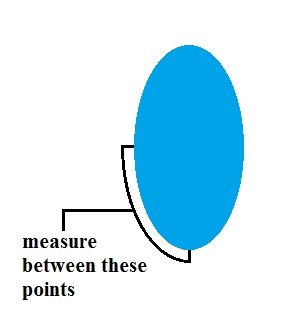 | With your pipe cleaner, measure the distance from the center bottom of the cab to the center side. Mark this on your wire bundle, from the center of the wrap to the distance measured. Mark the same distance on the other side. Make another wrap at each of these marks, just as you did the first one. |
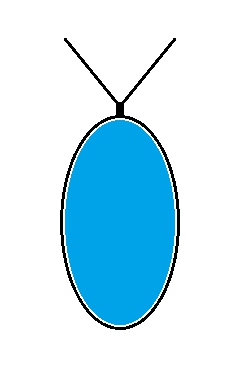
Place the center wrap at the bottom center point of the cab and gently bend the wires around the cab. The wraps should all be centered at the sides and bottom.
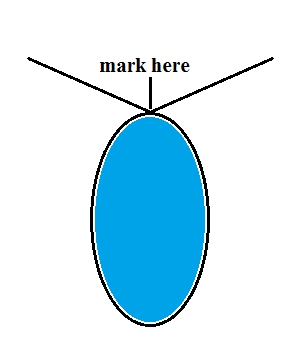
Continue bending the wires all the way around the stone; mark the spots on each end where they cross at the top center. Remove the stone and set it aside for now.
Continue bending the wires all the way around the stone; mark the spots on each end where they cross at the top center. Remove the stone and set it aside for now.
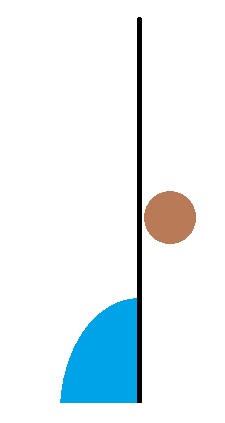
Using your flat nose pliers, bend each end of the bundle straight up at these marks. Tape the ends together making sure you leave at least 20 mm (¾") space up from the wrap. The wire bundles should be lying right against each other.
Make another wrap wire just like the first ones, however, this time make your hook slightly larger by placing the wire further up the pliers. Hook the wire around both bundles near the point where they have been bent upwards and make another wrap like the others. Once the wires are wrapped together, remove the tape. Using your chain nose pliers, gently hold the piece at the wrap you’ve just done and with your pocket knife, separate the two bundles.
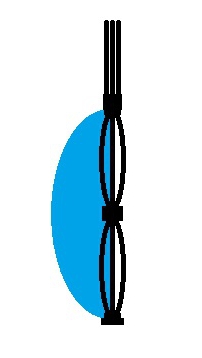
With your pocket knife, gently separate the wires in each quarter, only a little bit.

Decide which side will be the front of the pendant. With your chain nose pliers, gently grasp the front wire only, at the wrap and twist it inwards, about ¼ - ½ turn. Do this for the front wire only at each wrap.
Place the cab in the setting, with the front dome of the cab pressing against the wires you just bent. With your flat nose pliers twist the back wires in, just as you did the front wires. The bends will be larger because the pliers are wider. Once you have completed this step, your cabochon should be secure in its setting.
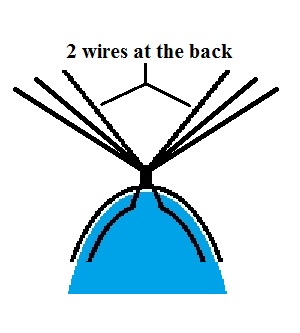
All that's left now is the bail! You should now have 6 wires sticking up at the top of your pendant. We're going to use two of these wires to make a simple bail. Choose two wires on the back of the pendant, one wire on either side of the bundle.
Straighten those two wires so that they are standing almost straight up and down, the rest of the wires you can bend down out of the way.
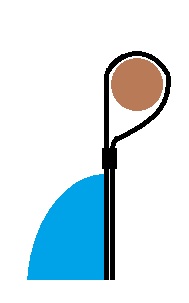
 |  | Use your Sharpie, or a pen or pencil, as a mandrel to shape the bail. Place the mandrel on the back of the two bail wires and bend them around the mandrel. |

Using your flat nose pliers, bend the wires straight down again where they cross themselves. Make sure you leave a little space between the bottom of the bail and the top of the cabochon.
Cut a 50 mm (2” ) piece of 24 ga wire to use as a wrap wire. From the bottom of the loop, wrap the wires 5-6 times down toward the top of the cabochon.
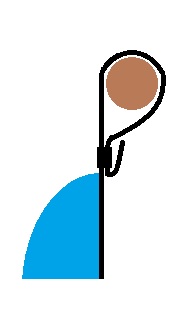
The bail wires that extend from the bottom of the wrap need to be bent up using your chain nose pliers. This ensures they don't slip out of the wrap. You can either snip these wires short, or use them to add decoration to your pendant. Make sure all your ends are filed so they won't catch on your clothing!
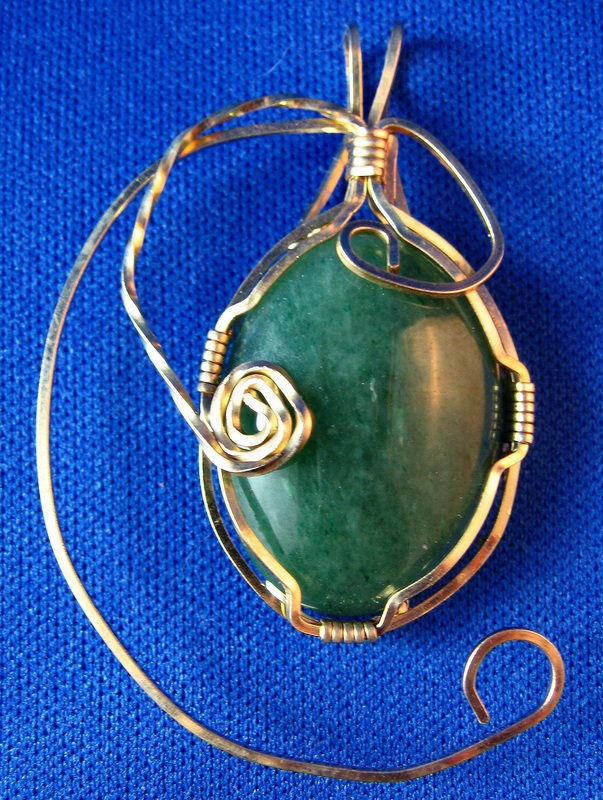
Use the extra wires to add decorative touches to your pendant.
Let your imagination run wild!
 RSS Feed
